
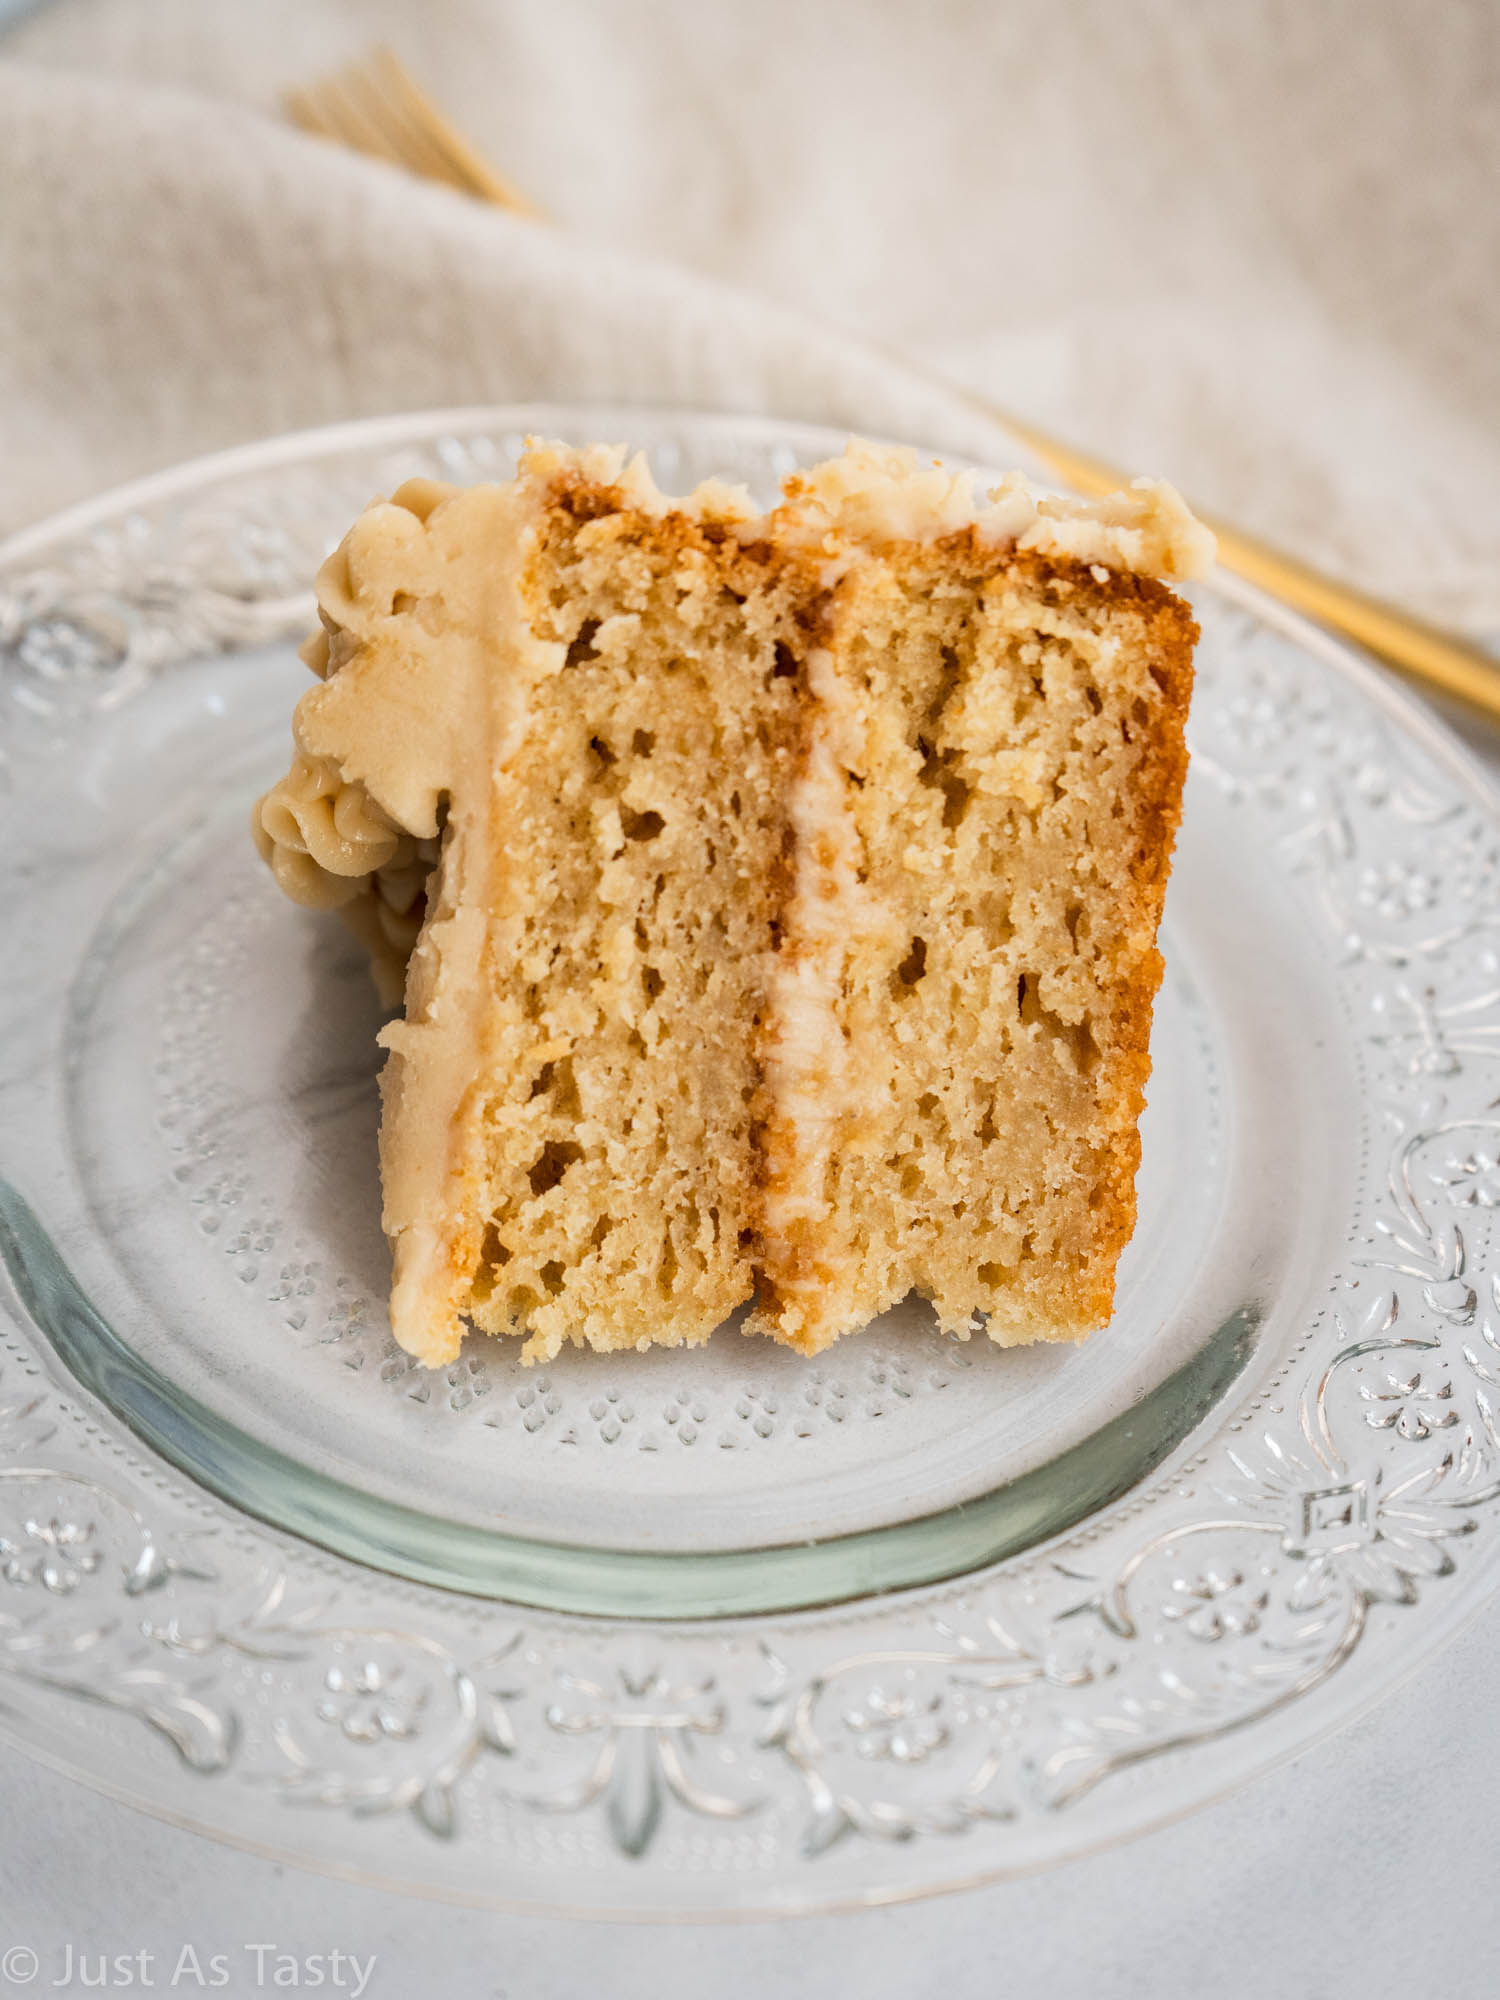
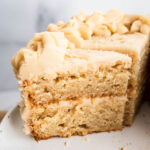
This classic butterscotch cake is ultra rich and so soft and moist. The easy butterscotch frosting is the perfect finishing touch. I'm a huge fan of cake and this one is definitely one of my favorites!
I'm a huge fan of butterscotch anything. Butterscotch pudding (I have a great recipe for that in my book, by the way!), butterscotch chip cookies, butterscotch pie, butterscotch candy. It's all completely irresistible, as far as I'm concerned! So it was only a matter of time before I came up with a butterscotch cake recipe, right?
This cake can be made with either gluten free flour or AP flour. Making a gluten free layer cake might seem intimidating, but I promise the process is so simple. And, like all of my cakes, no one will even be able to tell this is gluten free! It's perfectly soft, moist, and delicious.
I opted to use my 6-inch cake pans for this cake because I love the idea of making two little cake layers. Sometimes a whole 9-inch cake is a LOT, especially with all of that sweet frosting on top.
I think this is the perfect small batch dessert. It's such a fun twist on a classic two-layer frosted cake and I am sure everyone you serve it to will be a fan! Let's talk through the process.
Jump to:
What Exactly Is Butterscotch?
Butterscotch is a sweet, rich, and creamy flavor that comes from combining brown sugar and butter. It's warm, indulgent, and has a slightly nutty undertone that makes it perfect for cakes and desserts.
Why You'll Love This Recipe
- The flavor in this cake is unbelievably good. We're using brown sugar in the cake layers, for that warm flavor we all LOVE in butterscotch. And then we're making a butterscotch frosting to go on top (and between the layers!).
- If you want to whip up a butterscotch birthday cake that is sure to impress, this is the one for you. It's a straightforward recipe, with ingredients you likely already have on hand. Not that you need a special occasion though 😉
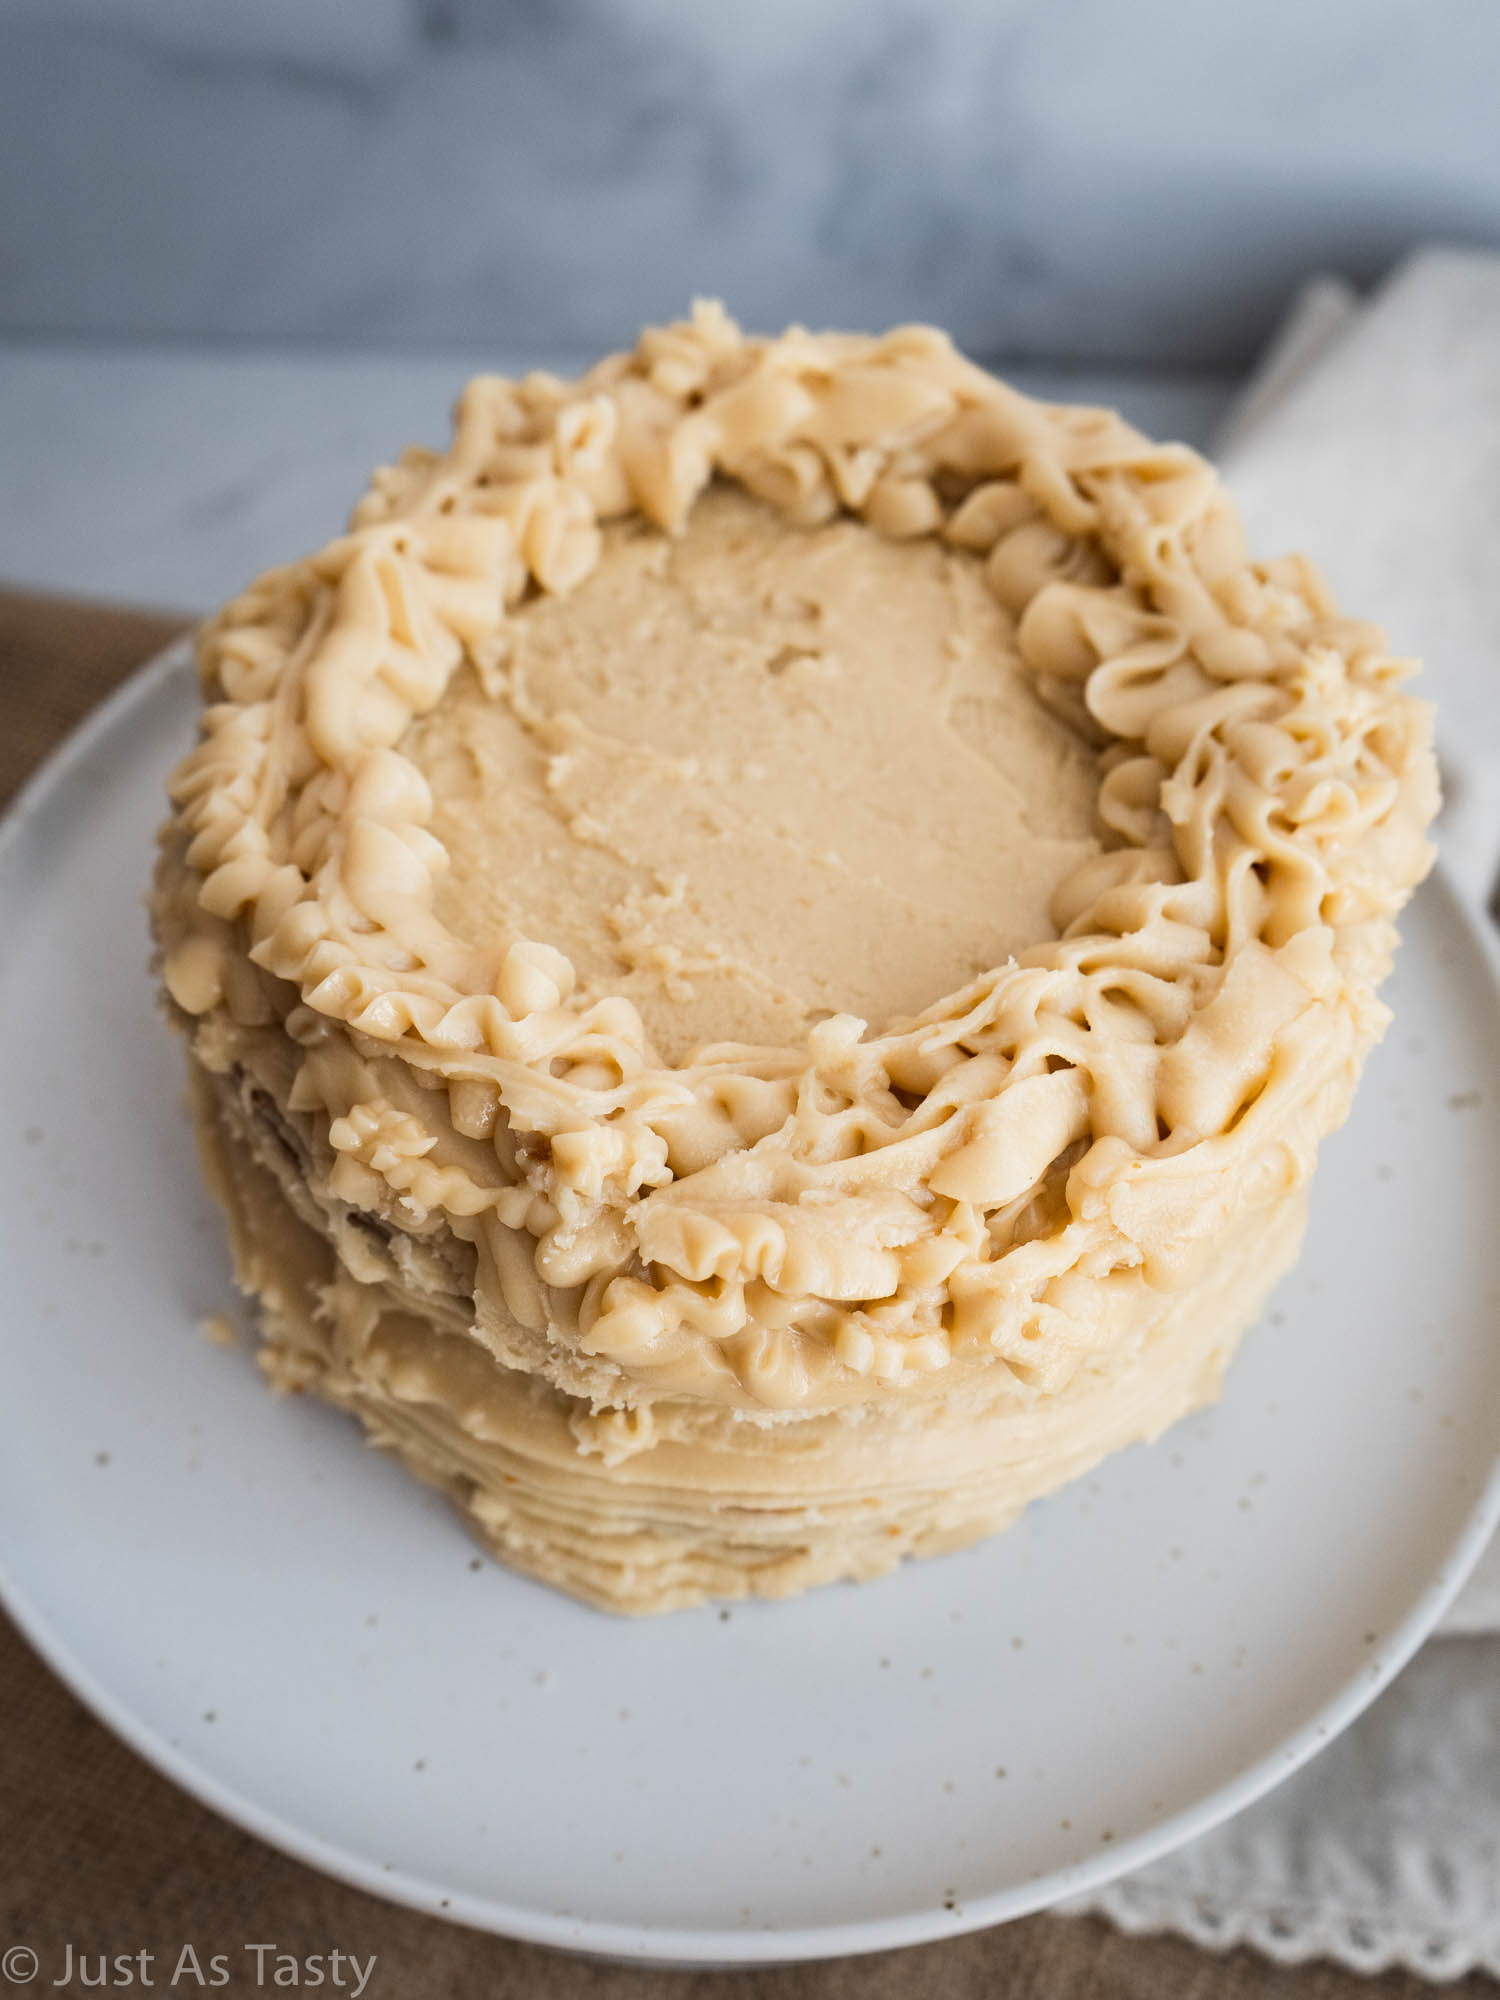
- You can get creative with the decorating! You can simply spread the frosting on the cake, or add some fun piping.
Ingredient Notes & Substitutions
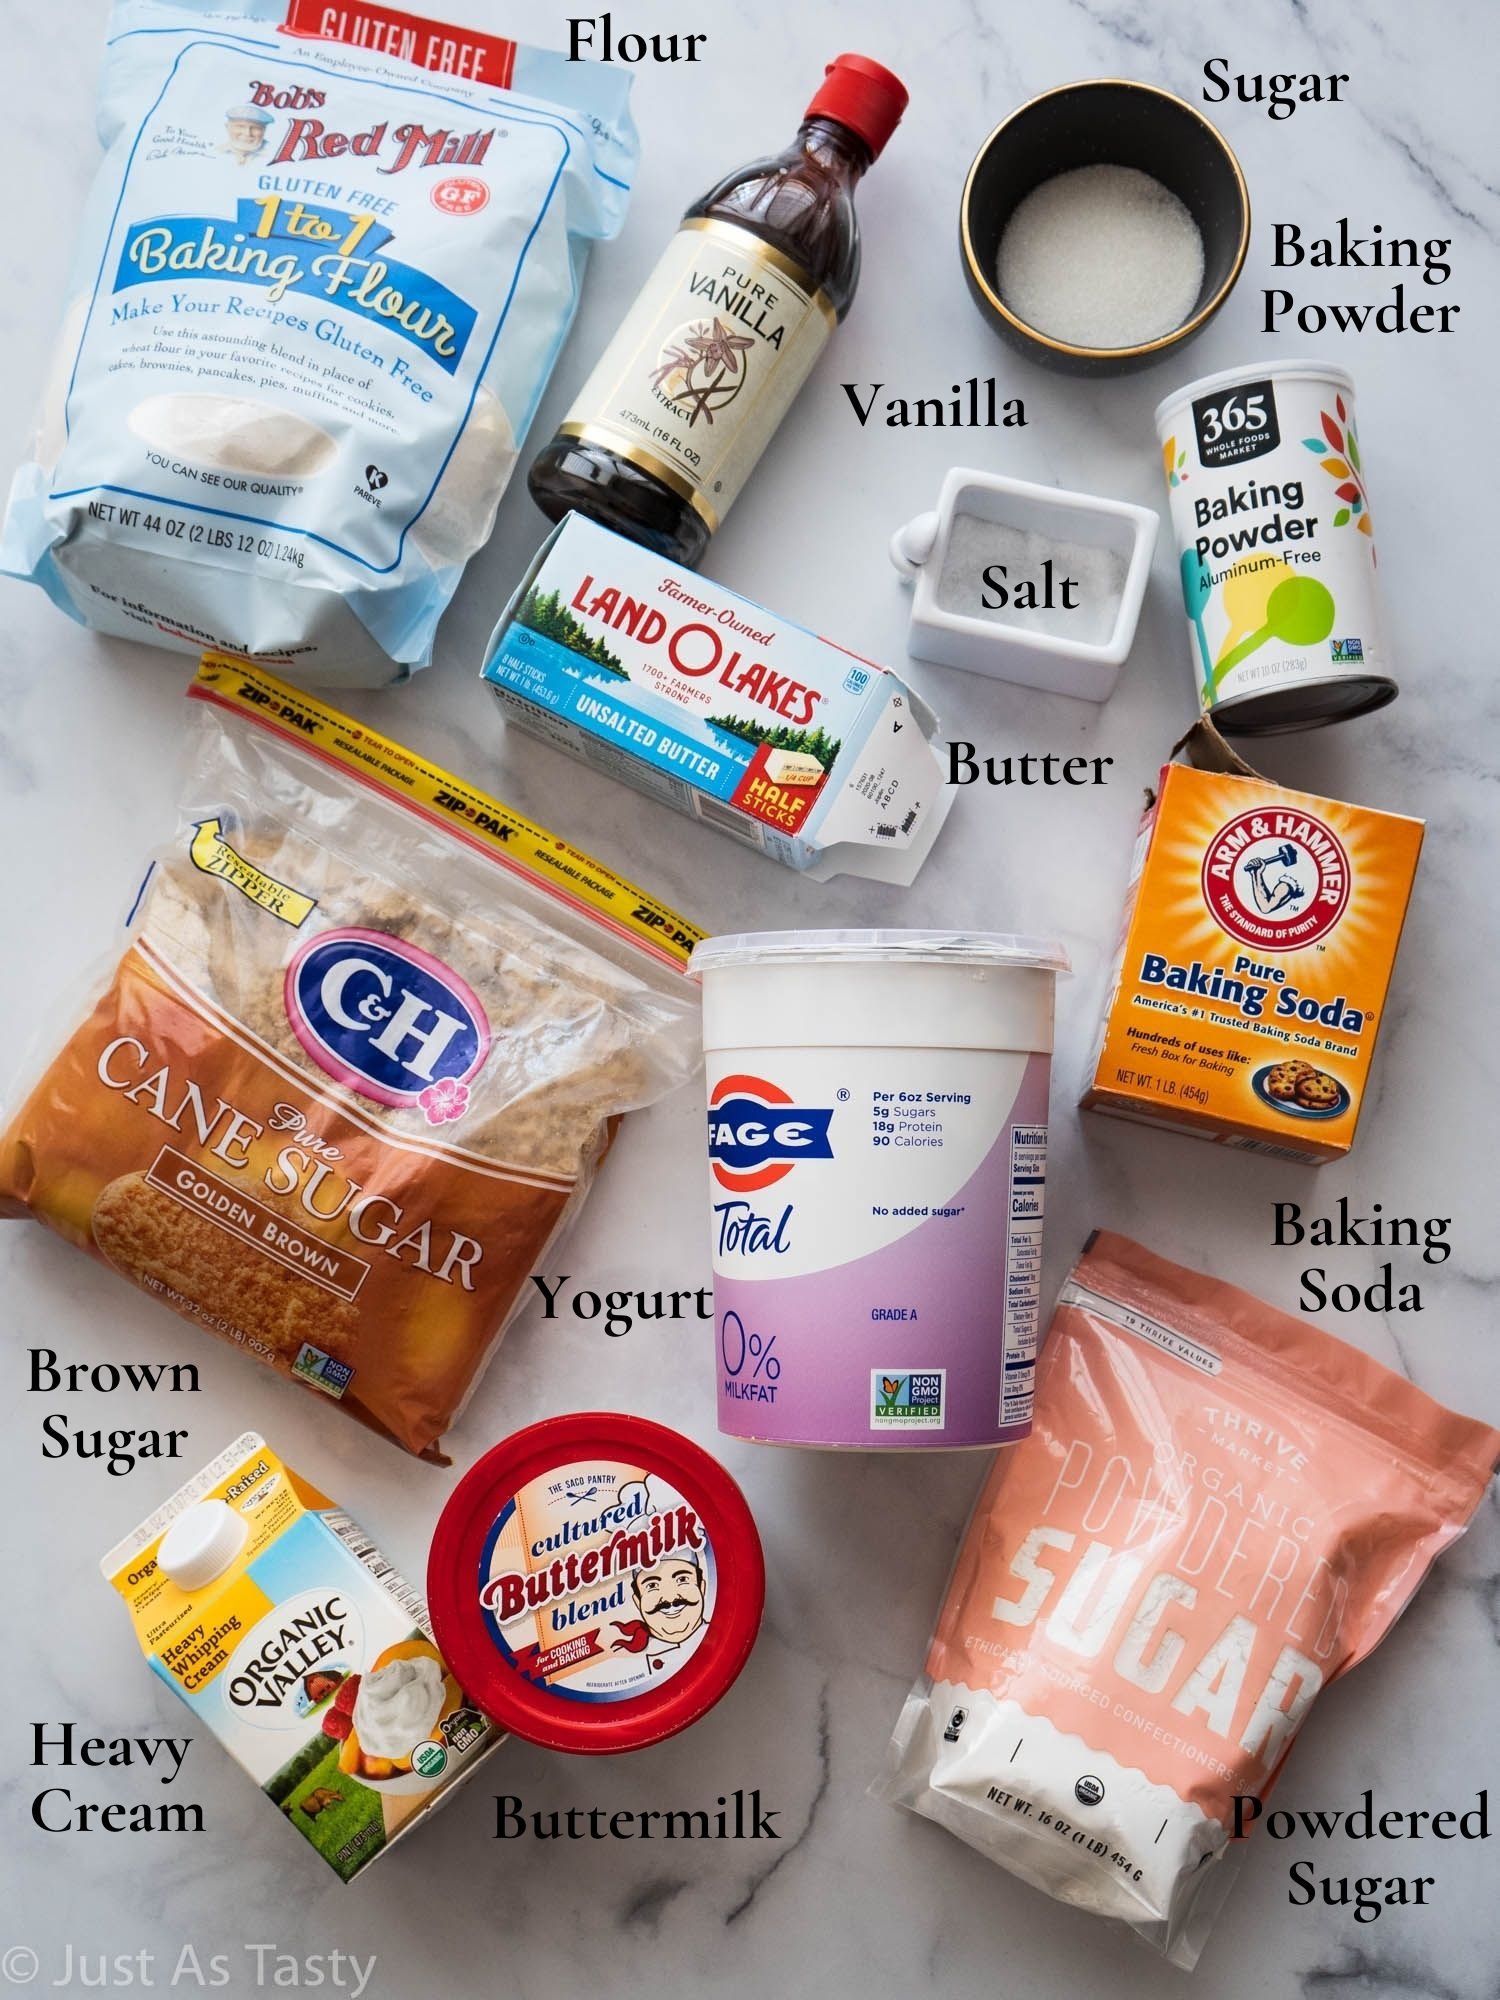
- Flour: My favorite gluten free flour is Bob's Red Mill 1 to 1. This is the flour I use to develop all of my recipes unless otherwise noted. If you are using a different blend, make sure it contains xanthan gum. If you are not gluten free, feel free to use AP flour.
- Brown sugar: I recommend light brown sugar for this recipe.
- Yogurt: Greek yogurt can be a great egg substitute in cakes! I like to use either 0% or 2% milk fat.
- Buttermilk: I like keeping powdered buttermilk in my refrigerator because it lasts so much longer. I mix it with water (follow the directions on the package) and use it that way rather than using it with my dry ingredients. However, you can also use regular buttermilk.
Step-by-Step Instructions
Make the cake layers:
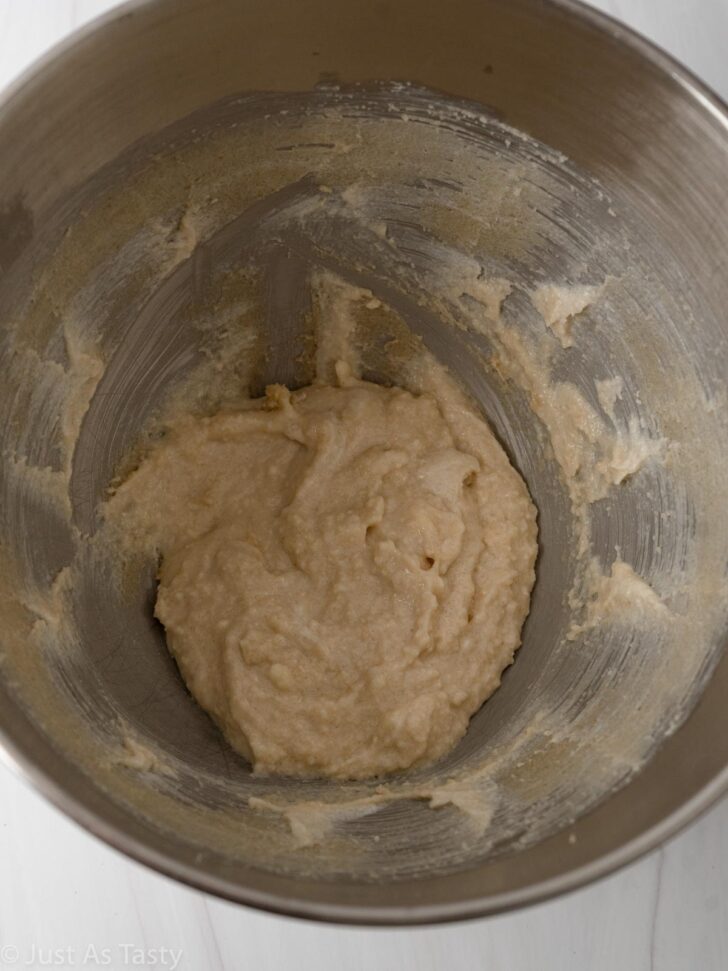
STEP ONE: To make my butterscotch cake, we'll start by combining all of the dry ingredients in a bowl and then set it aside.
STEP TWO: Use a mixer to cream the butter with both sugars. You'll want it to be smooth and slightly lighter in color.

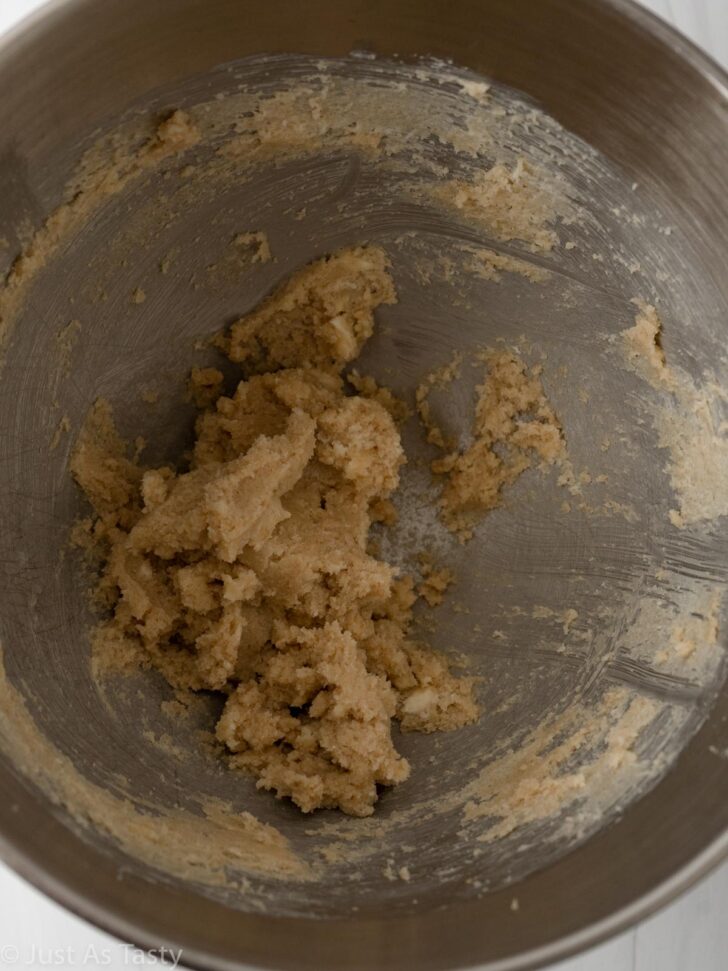
STEP THREE: Add in the yogurt and vanilla extract and give it a good mix to incorporate.
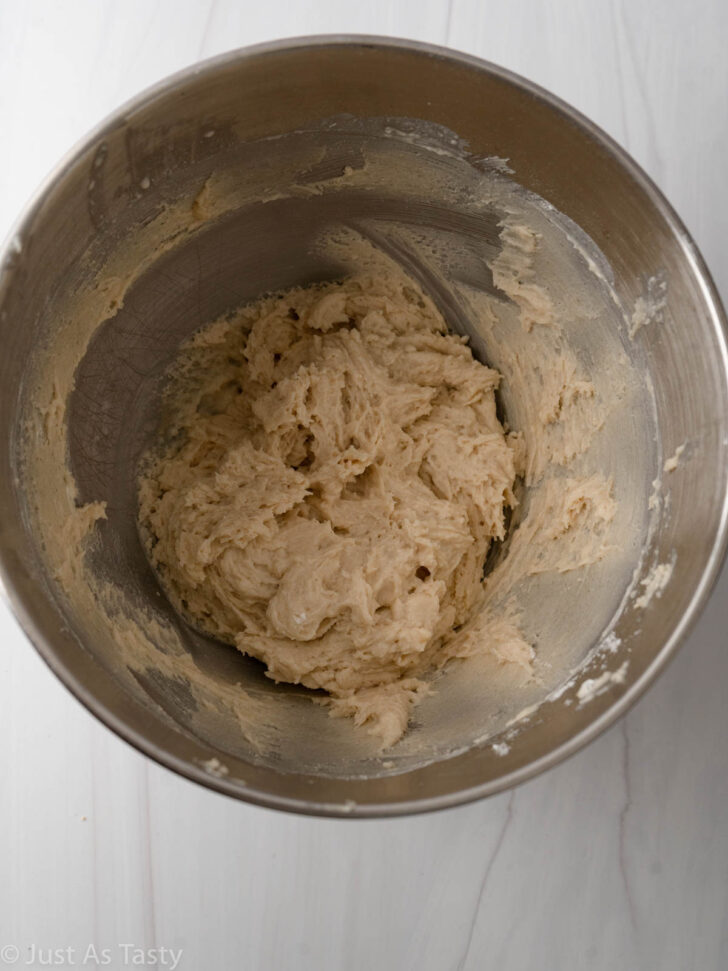
STEP FOUR: Now, we'll be adding in the dry ingredients but we're alternating with the buttermilk. Start by adding in half of the dry mix, followed by all of the buttermilk, followed by the rest of the dry mix. Pause to mix just briefly after each addition.
STEP FIVE: Once all of that is nice and combined, go ahead and divide the cake batter evenly between two greased 6-inch pans. Bake on 350ºF for about 28 minutes. Allow the cakes to cool in the pans for around 10 minutes before transferring to a wire cooling rack.
Make the butterscotch frosting:
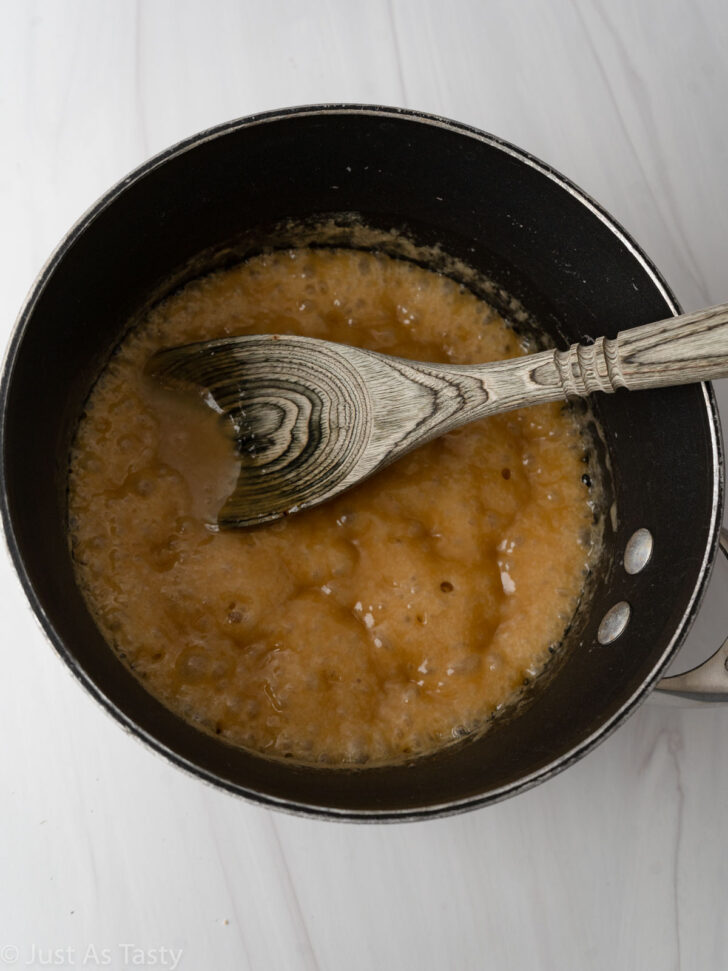
STEP SIX: To make the butterscotch frosting, we're basically starting by making butterscotch sauce. Melt the butter in a medium saucepan over medium-high heat. Once that's completely melted, add in the brown sugar, heavy cream, and salt. Bring the mixture to a boil and allow it to cook for around 5 minutes, then remove from the heat.
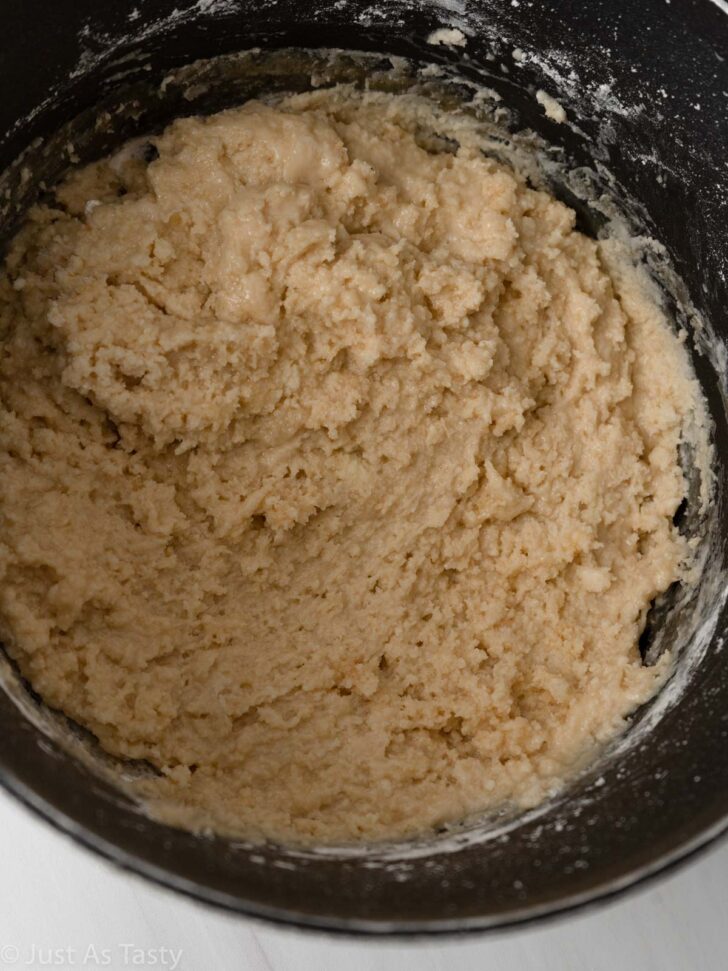
STEP SEVEN: Once the sauce has cooled to room temperature, you can go ahead and add in the powdered sugar. Depending on the consistency, you may need to add some more heavy cream, one tablespoon at a time. Just add a bit and keep mixing until your frosting is spreadable. And there you have it! Butterscotch frosting. Easy, right?
Assemble the cake:
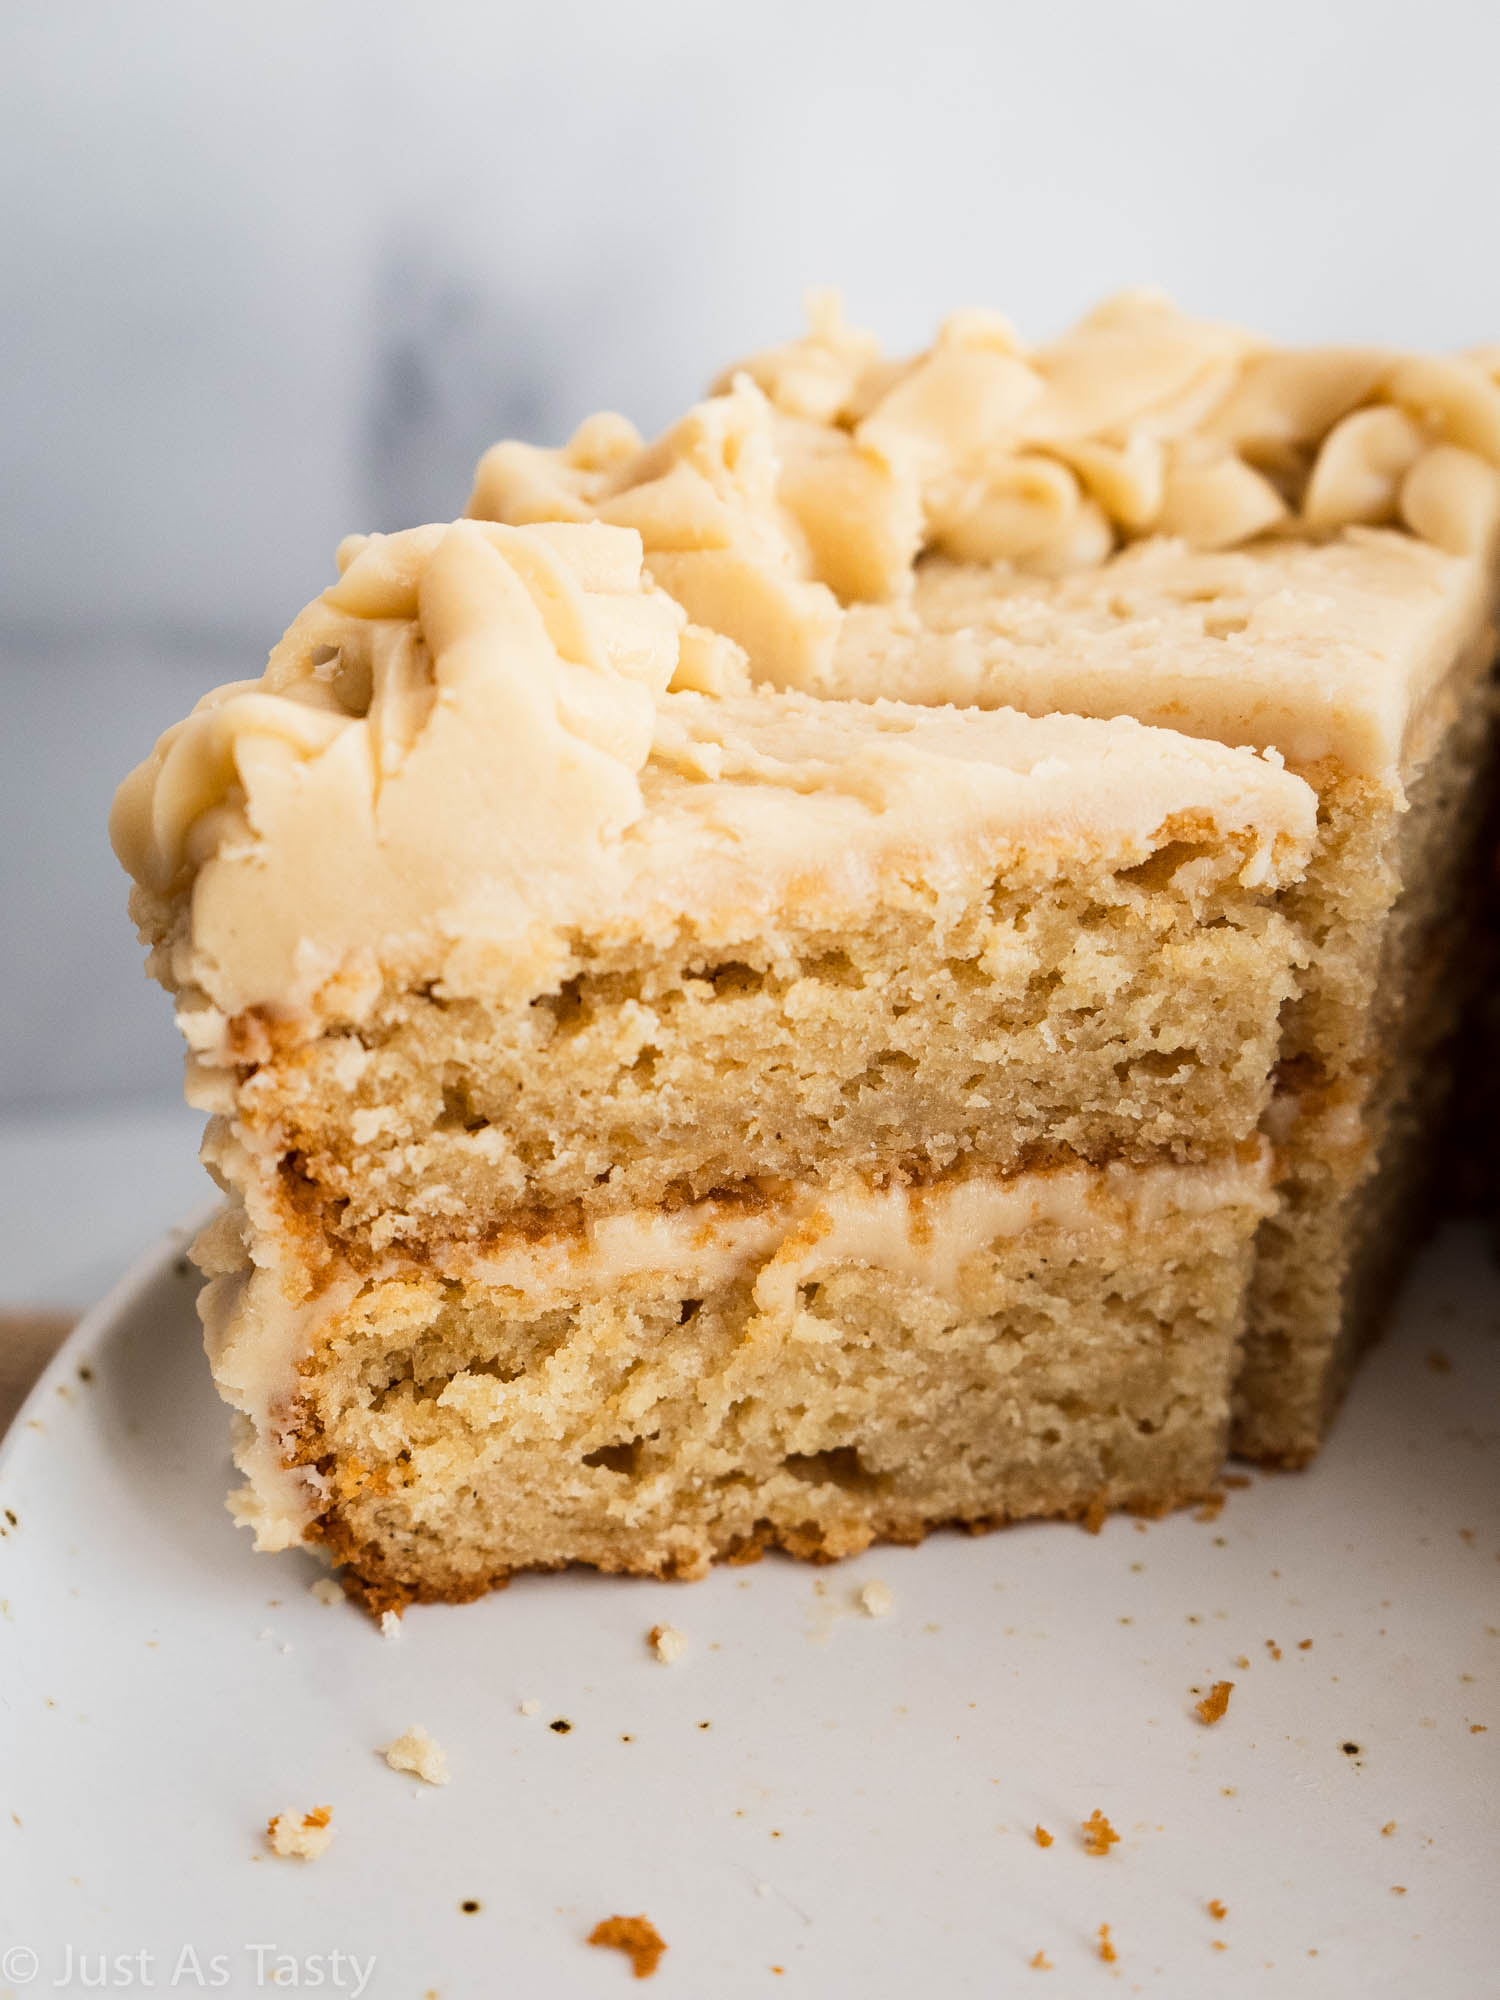
To assemble the cake, you will want to place one layer onto your cake stand or plate. You may need to use a serrated knife to level off the tops of the cakes, but I didn't do that here.
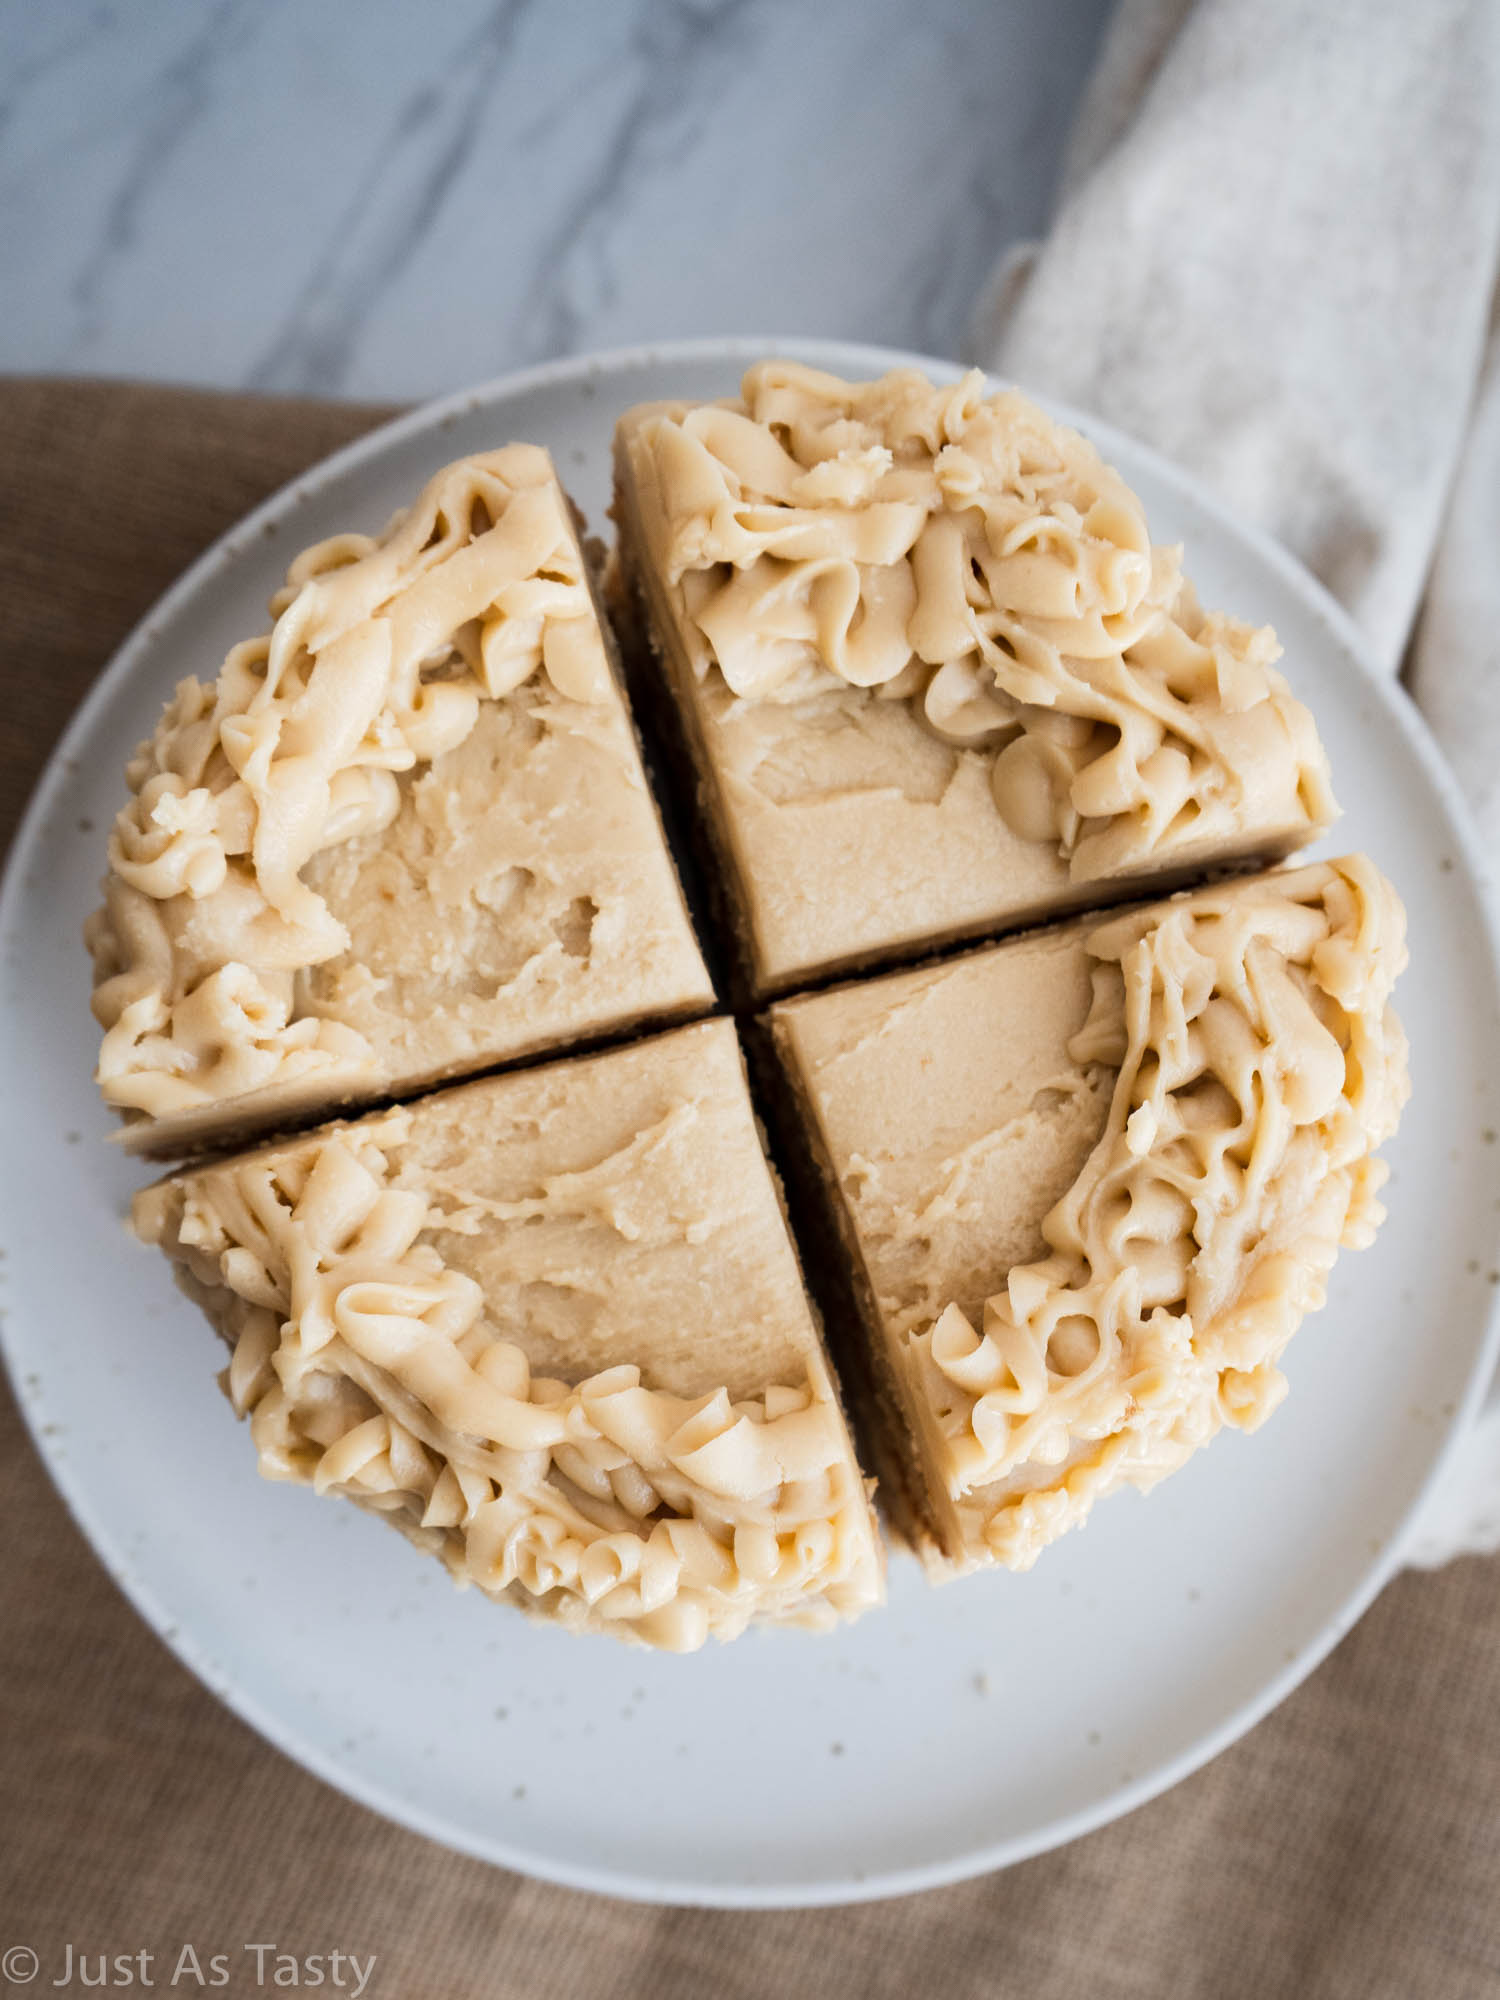
Top the first layer with about half a cup of frosting. Spread evenly before placing the second cake layer right on top. From here, you can go ahead and use up all of your frosting to coat the sides and top of the cake. I opted for some piping around the top, but you can do it however you like!
Expert Tips
- As with all of my recipes, my #1 tip is to use a kitchen scale to weigh your flour. This is the best way to ensure 100% accuracy, and accidentally adding too much flour can really mess with the texture of your baked goods. We'll need 197 grams of flour for this recipe.
- When you add the brown sugar, cream, and salt to the melted butter, it will likely start to bubble up. That's because we're adding cold cream to hot butter. This is nothing to be worried about and is totally normal, just be careful not to burn yourself.
- When it comes to frosting the cake, it's incredibly important that your cakes are completely cooled. This is why I often like to spread the process out over two days. I like to bake the cake layers the night before I plan to serve the cake. I'll then wrap them each individually in plastic wrap (make sure it's tight!) and store on my kitchen counter until the next day. I prefer to make the frosting the day I'm using it, but you can also make that the day before and refrigerate it overnight. You might have to beat it quickly just to get the fluffy consistency again.
- You shouldn't really need a crumb coat on this cake, as it's not really a crumbly cake.
Frequently Asked Questions
Yes! If you don't have buttermilk, you can make your own by adding ½ cup of milk to 1 ½ teaspoons white vinegar.
Making this butterscotch cake vegan may be tricky. I haven't tested it, but you would need to substitute your favorite non-dairy butter and Greek yogurt. You would also need to make your own buttermilk using non-dairy milk. I don't think the frosting can be made dairy-free, as the heavy cream is essential to achieving the right consistency.
While in theory you can melt butterscotch chips for the frosting, I recommend against it. Homemade butterscotch sauce works much better for this recipe.
Did you try my butterscotch cake? Leave me a comment below or tag me on Instagram @justastastyblog and #justastastyblog!
Related Recipes You Might Like
📖 Recipe
The BEST Butterscotch Cake
Ingredients
For the cake layers:
- 1 ⅓ cups (197g) flour*
- 1 teaspoon baking powder
- ½ teaspoon baking soda
- ½ teaspoon salt
- ½ cup (113g) unsalted butter room temperature
- ½ cup (100g) light brown sugar packed
- 2 tablespoons granulated sugar
- ½ cup (113g) Greek yogurt room temperature
- ½ teaspoon vanilla extract
- ½ cup (120ml) buttermilk room temperature
For the butterscotch frosting:
- ½ cup (113g) unsalted butter
- ⅔ cup (134g) light brown sugar packed
- ⅓ cup (80ml) heavy cream
- ¼ teaspoon salt
- 3 cups (360g) powdered sugar
- 3-4 tablespoons heavy cream as needed
Instructions
To make the cake layers:
- Preheat the oven to 350°F. Grease two 6-inch cake pans and set aside.
- In a medium bowl, whisk the flour, baking powder, baking soda, and salt together. Set aside.1 ⅓ cups (197g) flour*, 1 teaspoon baking powder, ½ teaspoon baking soda, ½ teaspoon salt
- Using a hand mixer or a stand mixer fitted with the paddle attachment, cream the butter with both sugars until smooth. Add the yogurt and vanilla extract and beat to incorporate.½ cup (113g) unsalted butter, ½ cup (100g) light brown sugar, 2 tablespoons granulated sugar, ½ cup (113g) Greek yogurt, ½ teaspoon vanilla extract
- Add half of the dry ingredients, followed by the buttermilk, and mix on low speed until just combined. Add the remainder of the dry ingredients and mix on low speed until just combined.½ cup (120ml) buttermilk
- Divide the batter evenly between the pans. Bake for 28-30 minutes, or until a toothpick inserted into the centers of the cakes comes out clean. Cool in the pan for 10 minutes before transferring to a wire cooling rack to cool completely.
To make the butterscotch frosting:
- Melt the butter in a medium saucepan over medium heat. Stir in the brown sugar, heavy cream, and salt and bring to a boil. Allow the mixture to cook for 4-5 minutes. Remove from the heat and let cool to room temperature.½ cup (113g) unsalted butter, ⅔ cup (134g) light brown sugar, ⅓ cup (80ml) heavy cream, ¼ teaspoon salt
- Add the powdered sugar and mix well to combine. Add the additional heavy cream, one tablespoon at a time, until the desired consistency is achieved. Frosting should be smooth and spreadable.3 cups (360g) powdered sugar, 3-4 tablespoons heavy cream
To assemble the cake:
- Use a serrated knife to level the top of each cake, if necessary, to create a completely flat surface. Place one layer on your cake stand and spread ½ cup of frosting evenly on top. Position the second layer on top and evenly cover the top and sides with the remaining frosting.
Notes
- For a gluten free cake, use a gluten free flour blend such as Bob's Red Mill 1 to 1. Otherwise, use AP flour.
- The cake must be COMPLETELY cool before assembling and frosting.
- If you don't have buttermilk on hand, you can make your own. Add 1 ½ teaspoons of white vinegar into a liquid measuring cup, then fill with whole milk until you have ½ cup. Allow the mixture to sit 5-10 minutes before using.
- This cake can be made ahead of time. Once the cake layers have baked and cooled completely, cover tightly in plastic wrap and store at room temperature overnight. The frosting may also be made the night before and refrigerated in an airtight container, but I recommend making it fresh the day you are planning to assemble and serve the cake. If you do refrigerate the frosting overnight, allow it to come to room temperature before attempting to decorate the cake. You may need to beat it to achieve that fluffy consistency again.

Mary Lyn Wilson says
It could be that I used regular flour but the cake did not seem to rise. I made some cupcakes to and they were delicious. They were only about an inch tall.
Taleen Benson says
Oh that's interesting! I haven't tested this recipe with regular flour, so that could very well be the culprit. Did you use fresh baking powder and baking soda? Did you weigh the flour (rather than use measuring cups) to ensure you were adding the right amount? Too much flour can weigh the cake down. I'm glad you were still able to enjoy the cupcakes!
AS says
Hi! Can I use almond flour Instead?
Taleen Benson says
Unfortunately not, this recipe was developed using a gluten free blend and almond flour just wouldn't yield the same results.
Vicki says
This cake is delicious. Can't wait to have it again!
Taleen Benson says
Thank you, so glad you enjoyed it!
Bethany says
I'm planning to make this for a larger group. Have you tried this in two 9 inch round pans? Would I just multiply by 1.5?
Taleen Benson says
Hi Bethany, yes you're exactly right - it should be 1.5x the recipe. Bake time should be the same. I haven't tried it myself so please let me know how it goes!
Cassie D. says
I really love the texture of this cake! No one would know it’s gluten free. The frosting was really sweet, almost too sweet to me but that’s the only negative I have to give out. My husband had two slices and that’s a real compliment as he is hard to please with sweets treats! I will make this again for sure!!
Taleen Benson says
Thank you for the kind words, Cassie!
Lulu says
How to store the cake?
Taleen Benson says
I recommend storing in an airtight container in the refrigerator, up to about 4 days.
Lulu says
Thank you!
tanvi says
Hi! Can I use regular plain yogurt instead of Greek yogurt?
Taleen Benson says
I haven't tested it but it should work, it will just be slightly less rich. Let me know how it goes!
Heather says
Can I freeze the layers before frosting? I need to make ahead 4 days.
Taleen Benson says
Yes, that should be fine!
Kerrie says
Really delicious and so tender and really tastes like butterscotch and caramel. Cake was easy to make and everyone commented on how tender and how tasty it is. Icing was a bit more work, mostly because I had to adapt the heavy cream to make it vegan, but worth the effort. I made it in an 8 inch pan plus one mini springform pan (6 inches is not common in Canada). It is delicious. I will definitely make it again
Taleen Benson says
I'm so happy to hear that, thank you Kerrie!
Siobhan Phoenix says
I would really love to make this cake for my husband for his birthday this summer in August. I'd like to make it with a regular organic flour but I expect it will turn out different especially from the comment another person left. How do I figure out how much baking powder and baking soda??
Taleen Benson says
Hi! You can absolutely make this cake with regular flour, and you shouldn’t need to adjust the baking powder or baking soda at all. I use a cup-for-cup gluten-free flour blend, which is formulated to behave very similarly to wheat or AP flour, so the rise should be fine.